How to make a sword – the six step process
 The process of making a sword is more than what you see in the movies. For many people being a blacksmith is a fantasy where you pound steel against an anvil, dip it in water and voila! You have a completed sword ready to mow down the evil hordes of creatures that lurk in the forest. But swordmaking is much more than this. Swordmaking is both an art and a craft and it takes hard work, a lot of practice and a significant amount of specialized tools to create a sword. It also takes many years of practice to become proficient at this skill. The process of making a sword is more than what you see in the movies. For many people being a blacksmith is a fantasy where you pound steel against an anvil, dip it in water and voila! You have a completed sword ready to mow down the evil hordes of creatures that lurk in the forest. But swordmaking is much more than this. Swordmaking is both an art and a craft and it takes hard work, a lot of practice and a significant amount of specialized tools to create a sword. It also takes many years of practice to become proficient at this skill.
Before the blacksmith or swordsmith actually starts hammering or heating the metal for a sword there is a lot of work to be done. The sword size, shape, properties, and metal composition all have to be decided upon. These factors determine the amount of metal, the temperatures of heating and the specific steps in the process that have to be completed. This article doesn't cover the complete art of swordmaking. It will only discuss and outline the process of smithing the blade of a sword.
There are many different methods for making a sword and the art has changed over the centuries as technologies, tools and the science of metallurgy has changed. But for the past five hundred years there has been one method that still stands as the most common. This is the six step method. of taking a bar of the desired metal to a completed sword.
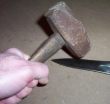
- The First step is Forging
A bar of the desired metal or combination of metals is heated in a forge and then it is hammered into shape.(The shape of a sword) This hammering process can take a long time and it is called drawing out the sword. The sword is worked on in sections (usually around 6 inches in length) and repeatedly hammered and heated until it comes into the desired shape .This process is repeated many times and the sword is often heated then allowed to cool without hammering. This is required by the metal to keep the desired properties of strength and flexibility. Once this step is completed the sword is in the proper shape but the properties of the metal make it very brittle and something has to be done to give flexibility to it.
- Step Two: Annealing Annealing softens the sword and makes it easy to grind into shape. The sword is now heated and then allowed to cool very slowly. Often it is wrapped in an insulating material to slow down this cooling. It can take as long as 24 hours and this annealing process makes the sword soft and easy to grind.
- Step Three: Grinding
Now the blacksmith uses a grinder to work out the edge and point of the sword. This would also be when any engraving is added. This is not a completed sword yet. It is still much too soft so it must be hardened.
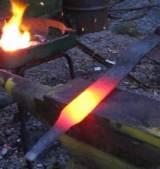
- Step Four: Hardening
Now the sword is heated to a very high temperature and then placed into a quenching tank. (This is what we always see in the movies). This quenching allows it to cool quickly and evenly which will harden the metal. After this hardening the sword is brittle and something must be done to make it strong yet flexible.
- Step Five: Tempering
Again the blade is heated and quenched. But now the heating is at a much lower temperature than was used at the hardening. This heating/quenching cycle may be repeated several times. This tempering allows the blade to be strong but not brittle. This is one stage where the skill and experience of the swordsmith is invaluable. It takes a trained hand and eye to understand the properties of the meta. It will have a certain amount of flexibility yet still retain its sharp edge. Now the sword is ready for completion.
- Step Six: Completion
The sword blade itself is now complete. Now the additional parts will be added such as the pommel the guard and the hilt.
For the past five hundred years the only way to learn the art of swordmaking was to find a skilled blacksmith or swordsmith that was willing to take you on as an apprentice. Because of the specialized skills and tools, and the skill that is required this tradition remains the best way to do it today.
Before you invest lots of time in money in equipment and materials you should find a master that is willing to teach you the basics of the art. You won't have to devote your life to endless hours of hammering against an anvil and with a little perseverance, a little patience and some practice you will be able to make some decent swords that you can be proud of.
 Want to see a sword forged? I have a set of videos that show you exactly how to make a sword from beginning to end. How to Forge a Sword Want to see a sword forged? I have a set of videos that show you exactly how to make a sword from beginning to end. How to Forge a Sword
The picture shows the beginnings of the sword. I am hammering it into shape on the anvil.
 The Complete Bladesmith: Forging Your Way To Perfection The Complete Bladesmith: Forging Your Way To Perfection
Looking for instructions in bladesmithing that'll put you on the cutting edge of the custom blade market? Then this definitive guide to forging world-class blades is for you. Written by a master bladesmith, this book tells you how to set up your forge, select your materials, fashion grips and hilts, grind edges and much more!
|